> ## Documentation Index
> Fetch the complete documentation index at: https://docs.zionapp.co/llms.txt
> Use this file to discover all available pages before exploring further.
# Student roster overview
> How the student roster works, who can see and change which students, and how status and bulk actions behave
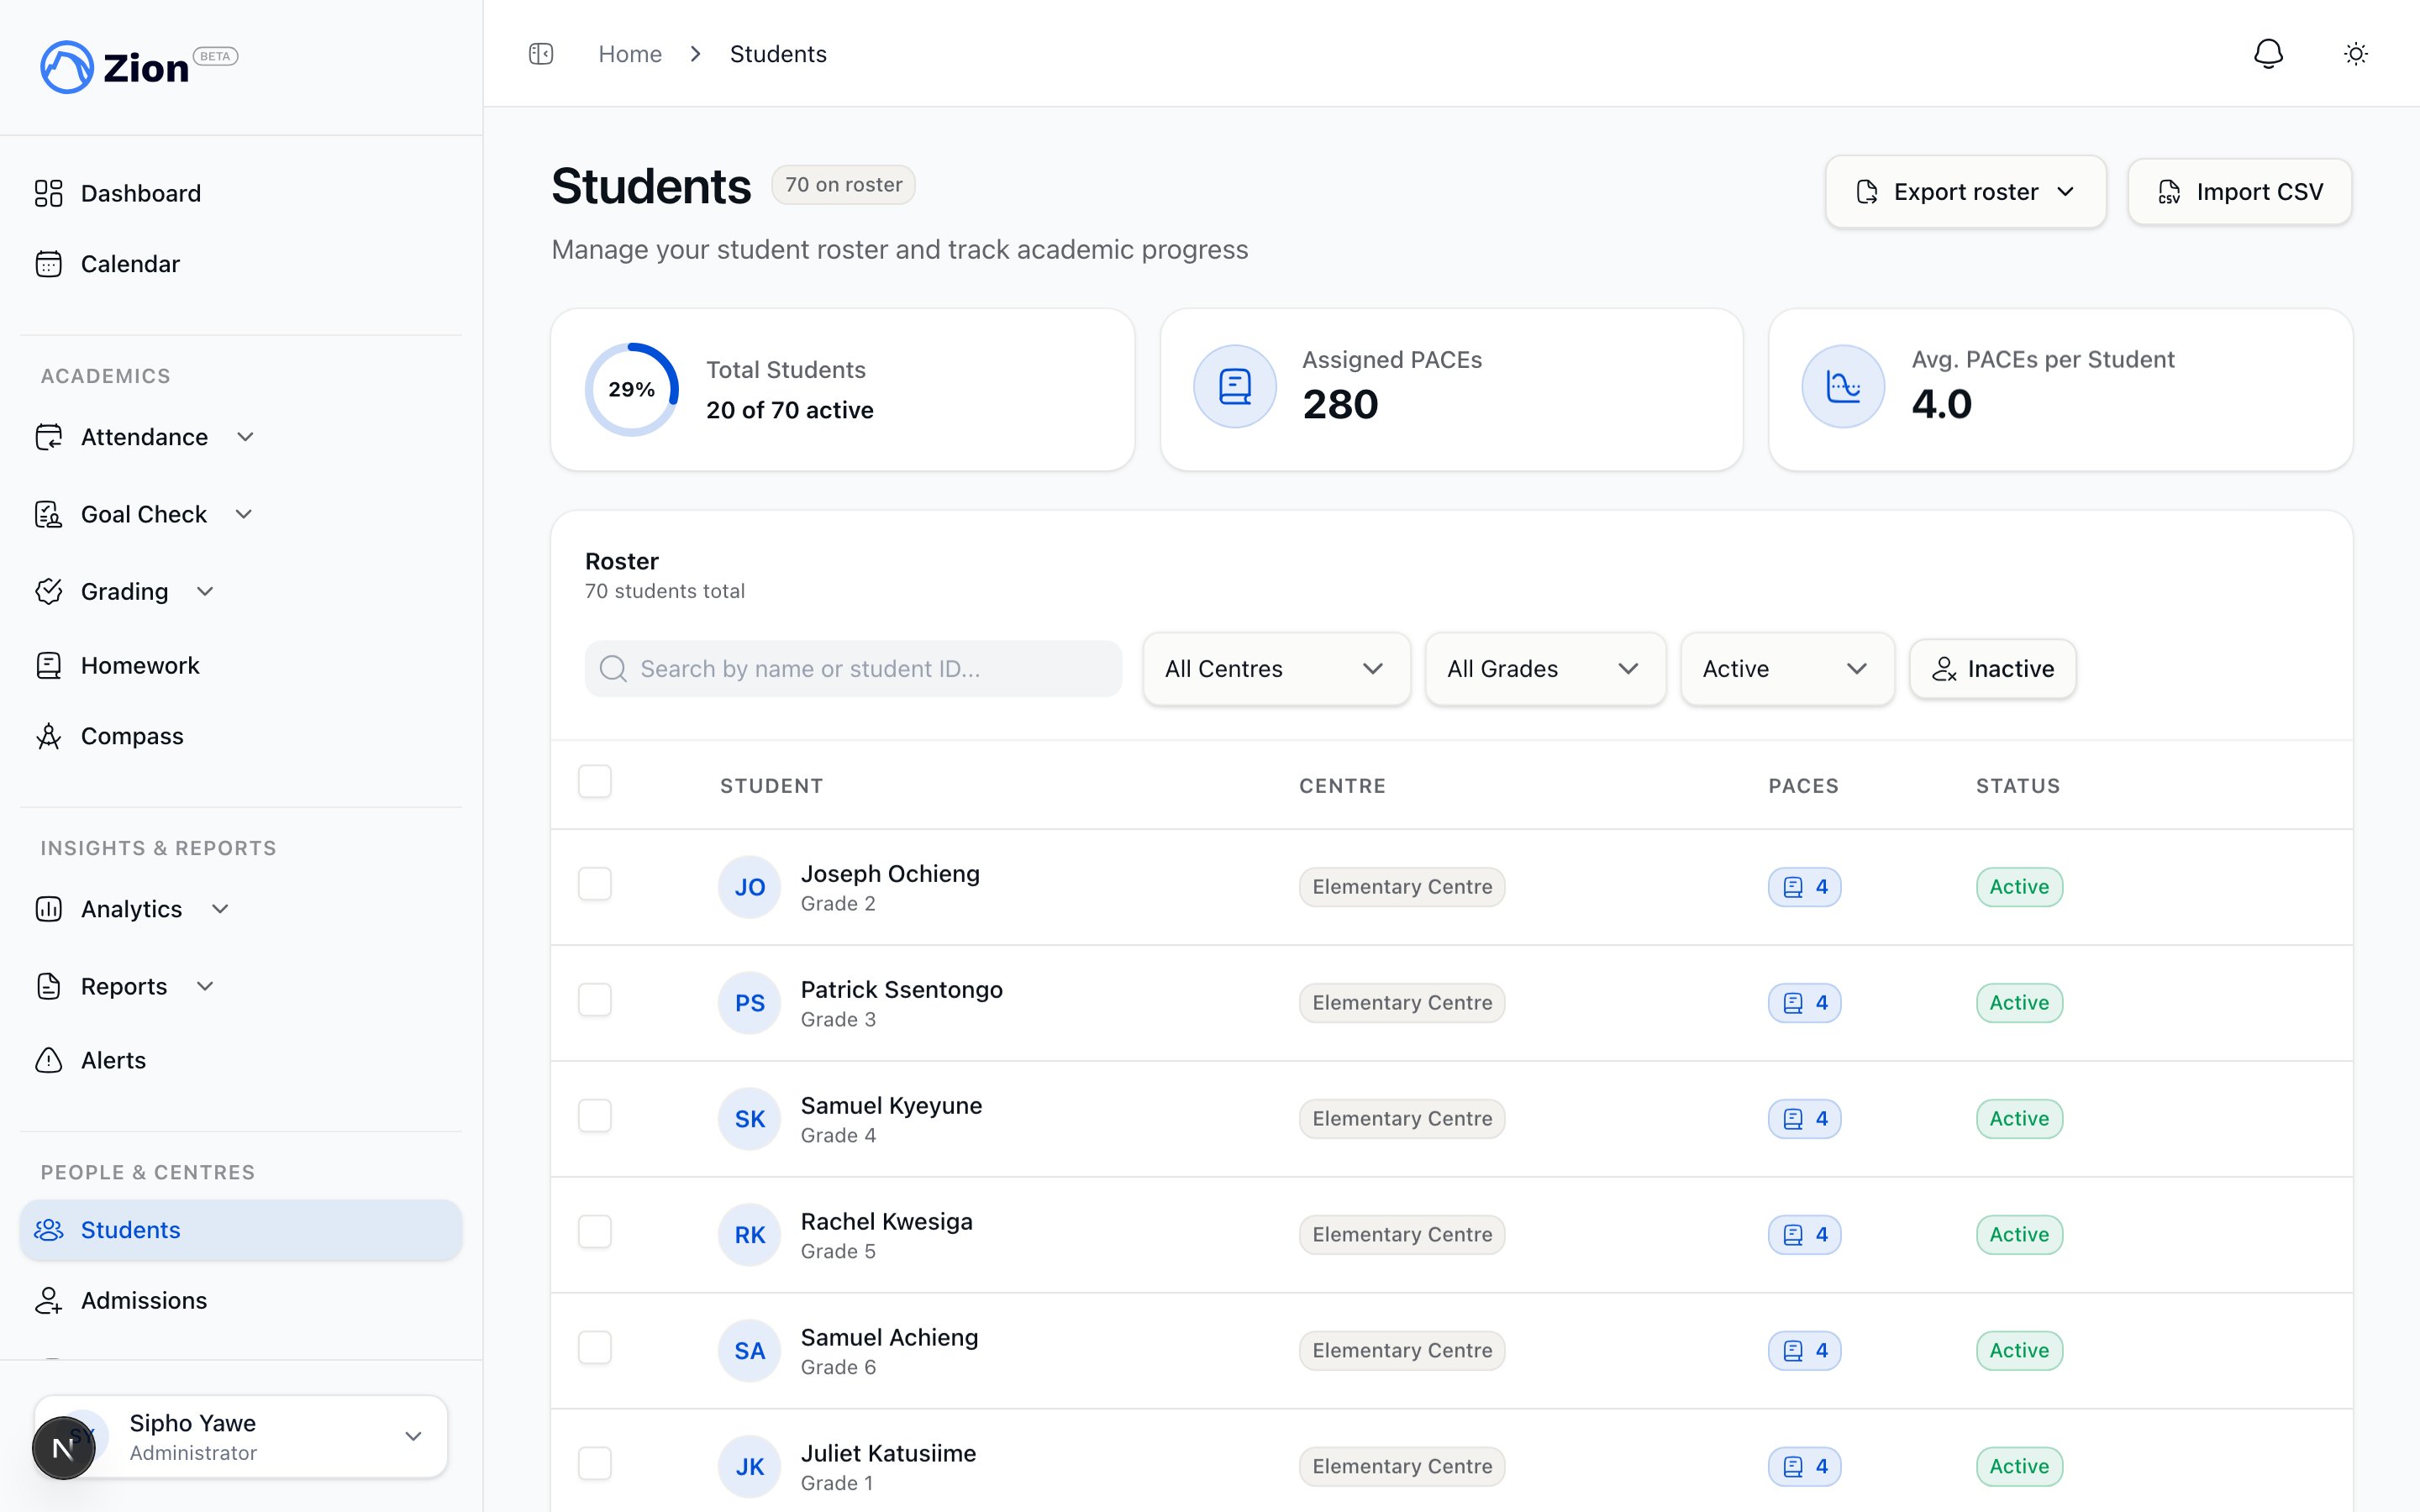
The student roster is the list of students at a school, held on the Students page. Every other feature, Goal Check, attendance, grading, report cards, reads from this roster, so an accurate list of active students tied to the right learning centre is the starting point for the rest of Zion.
Administrators, supervisors, and monitors all work with the roster. What each role can do differs for a few actions, covered below.
 ## Roster fields
Each student record holds:
| Field | Required | Notes |
| --------------- | -------- | ----------------------------------------------------------------------------- |
| Name | Yes | Shown across reports, Goal Check, and communications |
| Student ID | No | Your school's own identifier. Must be unique within the school if used |
| Date of birth | Yes | Must be a date in the past. Accepted as day/month/year or year/month/day |
| Grade level | Yes | 1 through 12 |
| Learning centre | Yes | Determines who can see and manage the student |
| Parent email | No | If set, a parent invitation is sent automatically when the student is created |
| Parent phone | No | |
A duplicate student ID within the same school is rejected before the record is saved.
## Creating a student
Navigate to Students in the sidebar.
Opens the new-student form (or use "Add Your First Student" on an empty roster).
Name, date of birth, grade level, and learning centre. Add a student ID and parent contact details if you have them.
The student appears on the roster immediately as active. If you entered a parent email, an invitation goes out in the background and does not block the save.
Administrators, supervisors, and monitors can all create students.
### Possible duplicate warning
If the name and date of birth you enter match a student already on the roster, Zion shows a warning before you save, in case the same child is being added twice under a different (or blank) school ID. This is only a heads-up: it never blocks the save, so a genuine second student who happens to share a name and birthday can still be added.
## Editing a student
Open the student from the roster and edit their details, including moving them to a different learning centre or updating their grade level. Changes take effect immediately: a centre change moves the student into the new centre's Goal Check and out of the old one right away.
## Deactivating and reactivating
Students are either active or deactivated. Deactivating is a soft removal, not a delete: history stays intact, but the student stops showing up day to day.
**Active students:**
* Appear in the default roster view and in Goal Check for their centre
* Can have goals set and progress marked
* Count toward active reports and metrics
**Deactivated students:**
* Are hidden from the default roster view until you filter to show them
* No longer appear in Goal Check for any centre
* Are excluded from active reports and metrics
* Keep their past records: goal entries, PACE history, and other historical data are preserved
* Can be reactivated at any time
On the Students page, locate the student in the roster.
Choose a reason category (Withdrawn, Graduated, Transferred, or Other) and, optionally, add notes with more context. Confirm to deactivate.
Use the same button to bring a deactivated student back. To find a deactivated student again, toggle the filter that shows deactivated students; they display with an inactive badge.
Only administrators and supervisors can deactivate or reactivate a student. Monitors do not have this control.
## Bulk grade-level promotion and graduation
At the end of a school year, an administrator can move every student up a grade in one action instead of editing each student individually.
Select students by learning centre and grade level, or pick individual students.
Turn on "Graduate final grade students instead of leaving them in place" if Grade 12 students in the batch should be deactivated as graduated, rather than skipped.
Zion shows what will happen to every selected student, promoted to the next grade, graduated, or skipped, and why, before anything is saved. Applying the batch carries out exactly what the preview showed.
Graduating a student through this workflow deactivates them the same way a manual deactivation does; their history is preserved and they can be reactivated later if needed. Up to 500 students can be included in one promotion batch.
## Centre-scoped visibility
Every student belongs to one learning centre, and that assignment controls who can see and manage them.
* **Administrators** see and can manage every student across the whole school.
* **Supervisors and monitors** only see and manage students in the learning centres they are assigned to. This is enforced no matter what filters they set on screen: if a supervisor or monitor applies a centre filter for a centre they are not assigned to, the result is an empty list, never a wider view of the school.
A student without a learning centre will not appear in any supervisor's or monitor's Goal Check, so centre assignment should happen as part of creating the student, not as an afterthought.
## Bulk roster actions
You can select multiple students at once, up to 200, and apply one action to all of them:
* **Bulk deactivate**: deactivate every selected student in one action.
* **Bulk reassign**: move the selected students to a different learning centre, a different grade level, or both.
* **Bulk assign PACEs**: assign up to 12 PACEs to all selected students in one step.
Each student in the batch is evaluated on its own. If one student cannot be changed, for example a progression rule blocks a PACE assignment, or the target centre is invalid for that student, that student is skipped with a reason and the rest of the batch still completes. A single record is written to the audit log for each bulk action you run.
Bulk assignment of PACEs follows the same progression rules as assigning a PACE to one student, and only PACEs already in your school's catalog can be assigned. See [PACE Assignments](/features/students/pace-assignments) for how progression is checked.
## Related pages
Add many students at once from a spreadsheet
Assign, complete, reopen, and unassign PACEs for a student
Browse the full ACE PACE reference
Create and configure the centres students are assigned to
Full breakdown of what each role can do
End-to-end walkthrough of roster setup and maintenance
## Roster fields
Each student record holds:
| Field | Required | Notes |
| --------------- | -------- | ----------------------------------------------------------------------------- |
| Name | Yes | Shown across reports, Goal Check, and communications |
| Student ID | No | Your school's own identifier. Must be unique within the school if used |
| Date of birth | Yes | Must be a date in the past. Accepted as day/month/year or year/month/day |
| Grade level | Yes | 1 through 12 |
| Learning centre | Yes | Determines who can see and manage the student |
| Parent email | No | If set, a parent invitation is sent automatically when the student is created |
| Parent phone | No | |
A duplicate student ID within the same school is rejected before the record is saved.
## Creating a student
Navigate to Students in the sidebar.
Opens the new-student form (or use "Add Your First Student" on an empty roster).
Name, date of birth, grade level, and learning centre. Add a student ID and parent contact details if you have them.
The student appears on the roster immediately as active. If you entered a parent email, an invitation goes out in the background and does not block the save.
Administrators, supervisors, and monitors can all create students.
### Possible duplicate warning
If the name and date of birth you enter match a student already on the roster, Zion shows a warning before you save, in case the same child is being added twice under a different (or blank) school ID. This is only a heads-up: it never blocks the save, so a genuine second student who happens to share a name and birthday can still be added.
## Editing a student
Open the student from the roster and edit their details, including moving them to a different learning centre or updating their grade level. Changes take effect immediately: a centre change moves the student into the new centre's Goal Check and out of the old one right away.
## Deactivating and reactivating
Students are either active or deactivated. Deactivating is a soft removal, not a delete: history stays intact, but the student stops showing up day to day.
**Active students:**
* Appear in the default roster view and in Goal Check for their centre
* Can have goals set and progress marked
* Count toward active reports and metrics
**Deactivated students:**
* Are hidden from the default roster view until you filter to show them
* No longer appear in Goal Check for any centre
* Are excluded from active reports and metrics
* Keep their past records: goal entries, PACE history, and other historical data are preserved
* Can be reactivated at any time
On the Students page, locate the student in the roster.
Choose a reason category (Withdrawn, Graduated, Transferred, or Other) and, optionally, add notes with more context. Confirm to deactivate.
Use the same button to bring a deactivated student back. To find a deactivated student again, toggle the filter that shows deactivated students; they display with an inactive badge.
Only administrators and supervisors can deactivate or reactivate a student. Monitors do not have this control.
## Bulk grade-level promotion and graduation
At the end of a school year, an administrator can move every student up a grade in one action instead of editing each student individually.
Select students by learning centre and grade level, or pick individual students.
Turn on "Graduate final grade students instead of leaving them in place" if Grade 12 students in the batch should be deactivated as graduated, rather than skipped.
Zion shows what will happen to every selected student, promoted to the next grade, graduated, or skipped, and why, before anything is saved. Applying the batch carries out exactly what the preview showed.
Graduating a student through this workflow deactivates them the same way a manual deactivation does; their history is preserved and they can be reactivated later if needed. Up to 500 students can be included in one promotion batch.
## Centre-scoped visibility
Every student belongs to one learning centre, and that assignment controls who can see and manage them.
* **Administrators** see and can manage every student across the whole school.
* **Supervisors and monitors** only see and manage students in the learning centres they are assigned to. This is enforced no matter what filters they set on screen: if a supervisor or monitor applies a centre filter for a centre they are not assigned to, the result is an empty list, never a wider view of the school.
A student without a learning centre will not appear in any supervisor's or monitor's Goal Check, so centre assignment should happen as part of creating the student, not as an afterthought.
## Bulk roster actions
You can select multiple students at once, up to 200, and apply one action to all of them:
* **Bulk deactivate**: deactivate every selected student in one action.
* **Bulk reassign**: move the selected students to a different learning centre, a different grade level, or both.
* **Bulk assign PACEs**: assign up to 12 PACEs to all selected students in one step.
Each student in the batch is evaluated on its own. If one student cannot be changed, for example a progression rule blocks a PACE assignment, or the target centre is invalid for that student, that student is skipped with a reason and the rest of the batch still completes. A single record is written to the audit log for each bulk action you run.
Bulk assignment of PACEs follows the same progression rules as assigning a PACE to one student, and only PACEs already in your school's catalog can be assigned. See [PACE Assignments](/features/students/pace-assignments) for how progression is checked.
## Related pages
Add many students at once from a spreadsheet
Assign, complete, reopen, and unassign PACEs for a student
Browse the full ACE PACE reference
Create and configure the centres students are assigned to
Full breakdown of what each role can do
End-to-end walkthrough of roster setup and maintenance