> ## Documentation Index
> Fetch the complete documentation index at: https://docs.zionapp.co/llms.txt
> Use this file to discover all available pages before exploring further.
# Administrator guide: staff management
> Invite and manage teaching staff accounts, assign roles and custom permissions, and track parent invitations
This guide walks administrators through the day-to-day work of staff management in Zion: inviting teaching staff, editing or deactivating accounts, layering custom permissions on top of built-in roles, and tracking whether parents have accepted their portal invitations.
Zion has five account roles: administrator, supervisor, monitor, student, and parent. 'Teaching Staff' is a directory label for accounts holding the administrator, supervisor, or monitor role, not a role of its own.
## Where staff accounts live
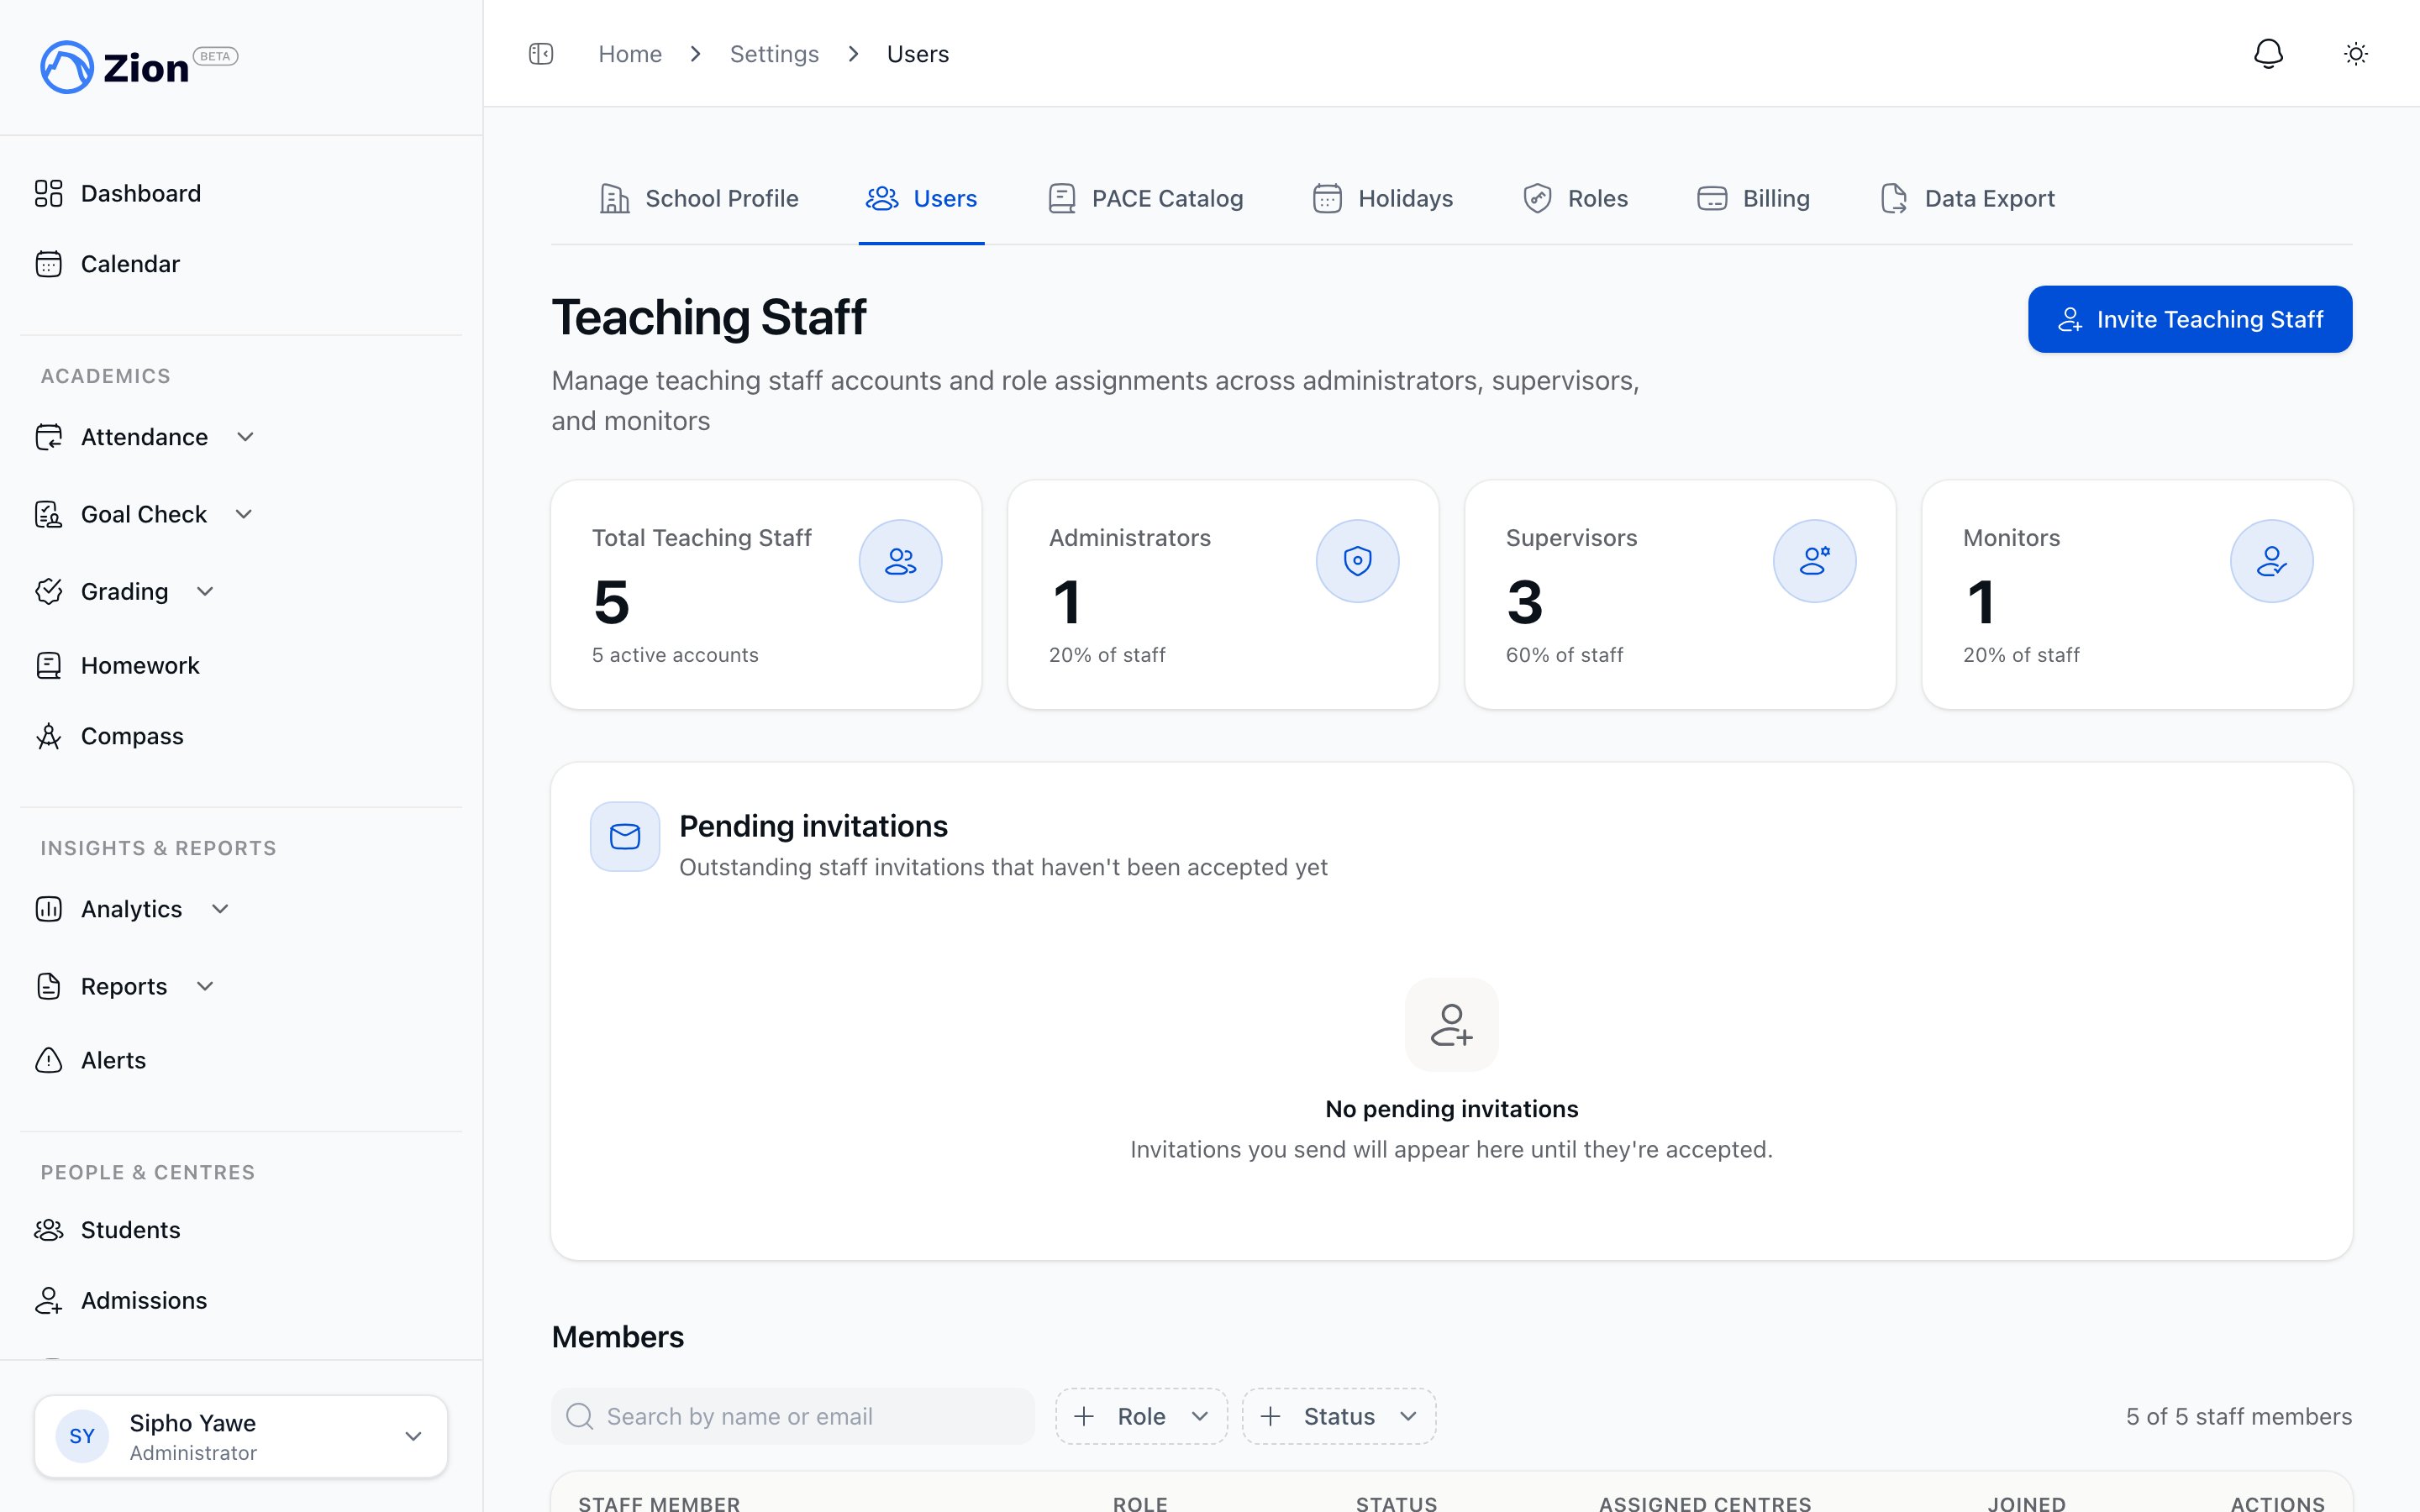 Two pages list the same set of teaching staff accounts:
* **Teaching Staff**, reached from the sidebar under People & Centres
* **Users**, reached from Settings > Users
Both show every administrator, supervisor, and monitor account, each person's assigned learning centres, and an 'Invite Teaching Staff' button. The Users page additionally shows a Pending Invitations table with email, role, sent date, status, and Resend or Revoke actions for invitations that have not been accepted yet, plus a 'Bulk invite' button for inviting many staff at once.
Create your learning centres before inviting staff. Monitors require at least one assigned centre at invite time, and supervisors are usually assigned one too.
## Inviting a teaching staff member
From Teaching Staff or Settings > Users, click 'Invite Teaching Staff'.
Enter the invitee's email address and choose a role: Administrator, Supervisor, or Monitor.
Monitor requires at least one learning centre. Supervisor centre assignment is optional but typical, since supervisors use assigned centres for approvals and reporting. Administrator clears any selected centres, since administrators are not centre-scoped.
Add a custom message, up to 500 characters, to include in the invitation email.
Zion sends an invitation email. The invitee opens it, sets their own password, and joins. The invite stays in the Pending Invitations table until accepted.
### Staff roles summary
| Role | Centre scope | Typical access |
| ------------- | --------------------------- | ------------------------------------------------------------------------------------ |
| Administrator | All centres | Full access across the school |
| Supervisor | Assigned centres | Runs the centre day to day, including goals, scores, attendance, and centre reports |
| Monitor | Assigned centres (required) | The same as a supervisor within their centres, on a slightly narrower set of screens |
Supervisors and monitors now carry the same permissions. Choose between them based on how you want the role described in your school and which screens you want that person to land on, not on what they are allowed to do with a student. See Roles and permissions.
For the complete staff-directory workflow, including editing details and reading the Pending Invitations table, see Teaching staff and user accounts.
## Inviting several staff at once
When you have a whole team to load, for example at the start of a school year, use bulk invite instead of inviting one person at a time.
Go to Settings > Users and click "Bulk invite."
Download the CSV template. Its columns are Email, First Name, Last Name, Role, and Learning Centres.
Fill in one row per person and upload the file back. Each row is invited the same way a single invite would be, with the role and learning centres from that row.
A row for someone who is already a member or already invited is skipped rather than treated as an error, so you can re-upload the same file safely if you add more rows later.
## Editing, deactivating, and reactivating staff
Open a user's detail page from the staff directory to edit their name, role, or centre assignments, and to view their account information, assigned custom roles, effective permissions, and recent activity.
Click Deactivate on the user's detail page. This blocks login, removes the person from the organization, and preserves their historical data for audit. Confirm in the dialog before it takes effect. Deactivating also unassigns them from every learning centre they held, cancels their confirmed upcoming meetings and notifies the affected parents, and flags any meeting request still pending for you to follow up on by hand.
Click Reactivate on a deactivated user. This restores their login, re-adds them to the organization, and restores their previous role.
Use Reset Onboarding when re-training a team member. It clears their onboarding progress so the getting-started guide shows again from the start.
Changing a staff member's role or centre assignments does not apply until they log out and back in. Tell them before you make the change.
## Roles and custom permissions
Every built-in role (administrator, supervisor, monitor, student, parent) is mirrored as a system role in Settings > Roles, so its exact grants are visible in the same list used for custom roles. Administrators can also create custom roles that add specific permission keys, grouped by area (Students, Goal Check, Grading, Attendance, Calendar, Reports, Settings, Roles & Permissions, Inventory), on top of a user's built-in role.
Custom roles are additive. Assigning one adds permission keys to what a user already has. It never replaces or downgrades a built-in role.
View every role in your organization: name, description, a System badge for built-in role mirrors, permission count, and member count.
Click New Role to start from scratch, or Clone an existing role, including a system role, to make a customizable copy. Check the exact permission keys to grant. System roles cannot be renamed, edited, or deleted.
On a user's detail page, add the custom role under Assigned Roles. You can also bulk-assign or bulk-remove a role across many users at once from the Roles page.
The Effective Permissions card on a user's detail page shows the resolved union of their built-in role and any assigned custom roles, attributing each key to the role that granted it.
A small number of permission keys are marked 'Coming soon' and disabled in the role editor because nothing in the app enforces them yet. For the full setup workflow and permission catalog, see Roles and permissions and the role and permission reference.
## Tracking parent invitations
Zion invites parents to the parent portal by email, tied to the parent email address on their child's student record. Administrators and supervisors can review invitation status and re-invite parents who have not yet accepted.
Go to People & Centres > Parents in the sidebar. Administrators and supervisors can open this page; monitors do not have it.
Each student with a parent email shows an invite status: Not invited, Invited, Accepted, or Revoked. A student with no parent email on file shows that instead.
Click Re-invite (or Invite, for a first attempt) next to a student to send or resend that parent's invitation. An accepted parent can be removed from the student with the Remove parent button, and a pending invitation can be revoked with the Revoke button.
Select several students and click Bulk Re-invite Selected. A summary reports how many invitations were sent, skipped because there is no parent email on file, skipped for cooldown, or failed.
A student without a parent email on file cannot be invited. Add the parent email to the student record first.
## Related resources
Full detail on the staff directory, invitation form, and pending invitations
Built-in roles, the permission catalog, and the role change history
Every permission key and what it unlocks
Create centres before assigning staff to them
Complete school setup, including inviting your first staff
Share this with new supervisors for their day-to-day workflow
Two pages list the same set of teaching staff accounts:
* **Teaching Staff**, reached from the sidebar under People & Centres
* **Users**, reached from Settings > Users
Both show every administrator, supervisor, and monitor account, each person's assigned learning centres, and an 'Invite Teaching Staff' button. The Users page additionally shows a Pending Invitations table with email, role, sent date, status, and Resend or Revoke actions for invitations that have not been accepted yet, plus a 'Bulk invite' button for inviting many staff at once.
Create your learning centres before inviting staff. Monitors require at least one assigned centre at invite time, and supervisors are usually assigned one too.
## Inviting a teaching staff member
From Teaching Staff or Settings > Users, click 'Invite Teaching Staff'.
Enter the invitee's email address and choose a role: Administrator, Supervisor, or Monitor.
Monitor requires at least one learning centre. Supervisor centre assignment is optional but typical, since supervisors use assigned centres for approvals and reporting. Administrator clears any selected centres, since administrators are not centre-scoped.
Add a custom message, up to 500 characters, to include in the invitation email.
Zion sends an invitation email. The invitee opens it, sets their own password, and joins. The invite stays in the Pending Invitations table until accepted.
### Staff roles summary
| Role | Centre scope | Typical access |
| ------------- | --------------------------- | ------------------------------------------------------------------------------------ |
| Administrator | All centres | Full access across the school |
| Supervisor | Assigned centres | Runs the centre day to day, including goals, scores, attendance, and centre reports |
| Monitor | Assigned centres (required) | The same as a supervisor within their centres, on a slightly narrower set of screens |
Supervisors and monitors now carry the same permissions. Choose between them based on how you want the role described in your school and which screens you want that person to land on, not on what they are allowed to do with a student. See Roles and permissions.
For the complete staff-directory workflow, including editing details and reading the Pending Invitations table, see Teaching staff and user accounts.
## Inviting several staff at once
When you have a whole team to load, for example at the start of a school year, use bulk invite instead of inviting one person at a time.
Go to Settings > Users and click "Bulk invite."
Download the CSV template. Its columns are Email, First Name, Last Name, Role, and Learning Centres.
Fill in one row per person and upload the file back. Each row is invited the same way a single invite would be, with the role and learning centres from that row.
A row for someone who is already a member or already invited is skipped rather than treated as an error, so you can re-upload the same file safely if you add more rows later.
## Editing, deactivating, and reactivating staff
Open a user's detail page from the staff directory to edit their name, role, or centre assignments, and to view their account information, assigned custom roles, effective permissions, and recent activity.
Click Deactivate on the user's detail page. This blocks login, removes the person from the organization, and preserves their historical data for audit. Confirm in the dialog before it takes effect. Deactivating also unassigns them from every learning centre they held, cancels their confirmed upcoming meetings and notifies the affected parents, and flags any meeting request still pending for you to follow up on by hand.
Click Reactivate on a deactivated user. This restores their login, re-adds them to the organization, and restores their previous role.
Use Reset Onboarding when re-training a team member. It clears their onboarding progress so the getting-started guide shows again from the start.
Changing a staff member's role or centre assignments does not apply until they log out and back in. Tell them before you make the change.
## Roles and custom permissions
Every built-in role (administrator, supervisor, monitor, student, parent) is mirrored as a system role in Settings > Roles, so its exact grants are visible in the same list used for custom roles. Administrators can also create custom roles that add specific permission keys, grouped by area (Students, Goal Check, Grading, Attendance, Calendar, Reports, Settings, Roles & Permissions, Inventory), on top of a user's built-in role.
Custom roles are additive. Assigning one adds permission keys to what a user already has. It never replaces or downgrades a built-in role.
View every role in your organization: name, description, a System badge for built-in role mirrors, permission count, and member count.
Click New Role to start from scratch, or Clone an existing role, including a system role, to make a customizable copy. Check the exact permission keys to grant. System roles cannot be renamed, edited, or deleted.
On a user's detail page, add the custom role under Assigned Roles. You can also bulk-assign or bulk-remove a role across many users at once from the Roles page.
The Effective Permissions card on a user's detail page shows the resolved union of their built-in role and any assigned custom roles, attributing each key to the role that granted it.
A small number of permission keys are marked 'Coming soon' and disabled in the role editor because nothing in the app enforces them yet. For the full setup workflow and permission catalog, see Roles and permissions and the role and permission reference.
## Tracking parent invitations
Zion invites parents to the parent portal by email, tied to the parent email address on their child's student record. Administrators and supervisors can review invitation status and re-invite parents who have not yet accepted.
Go to People & Centres > Parents in the sidebar. Administrators and supervisors can open this page; monitors do not have it.
Each student with a parent email shows an invite status: Not invited, Invited, Accepted, or Revoked. A student with no parent email on file shows that instead.
Click Re-invite (or Invite, for a first attempt) next to a student to send or resend that parent's invitation. An accepted parent can be removed from the student with the Remove parent button, and a pending invitation can be revoked with the Revoke button.
Select several students and click Bulk Re-invite Selected. A summary reports how many invitations were sent, skipped because there is no parent email on file, skipped for cooldown, or failed.
A student without a parent email on file cannot be invited. Add the parent email to the student record first.
## Related resources
Full detail on the staff directory, invitation form, and pending invitations
Built-in roles, the permission catalog, and the role change history
Every permission key and what it unlocks
Create centres before assigning staff to them
Complete school setup, including inviting your first staff
Share this with new supervisors for their day-to-day workflow