

Administrators are the only role with access to the Reports page and to corrections on locked past dates. Supervisors and monitors can mark attendance and, for supervisors, view a dashboard, alerts, and trends scoped to their own centres.
Your attendance responsibilities
Daily
- Review the school-wide attendance dashboard
- Check for new critical or warning alerts
- Confirm every centre has marked attendance for the day
- Follow up on anything urgent
Weekly
- Review attendance trends and centre comparisons
- Work through the alert queue and acknowledge or dismiss open items
- Generate a weekly report if your school requires one
Monthly or termly
- Generate a monthly or term report for leadership
- Review chronic absence patterns and how interventions are tracking
- Check whether alert thresholds still fit your school
Administrator dashboard
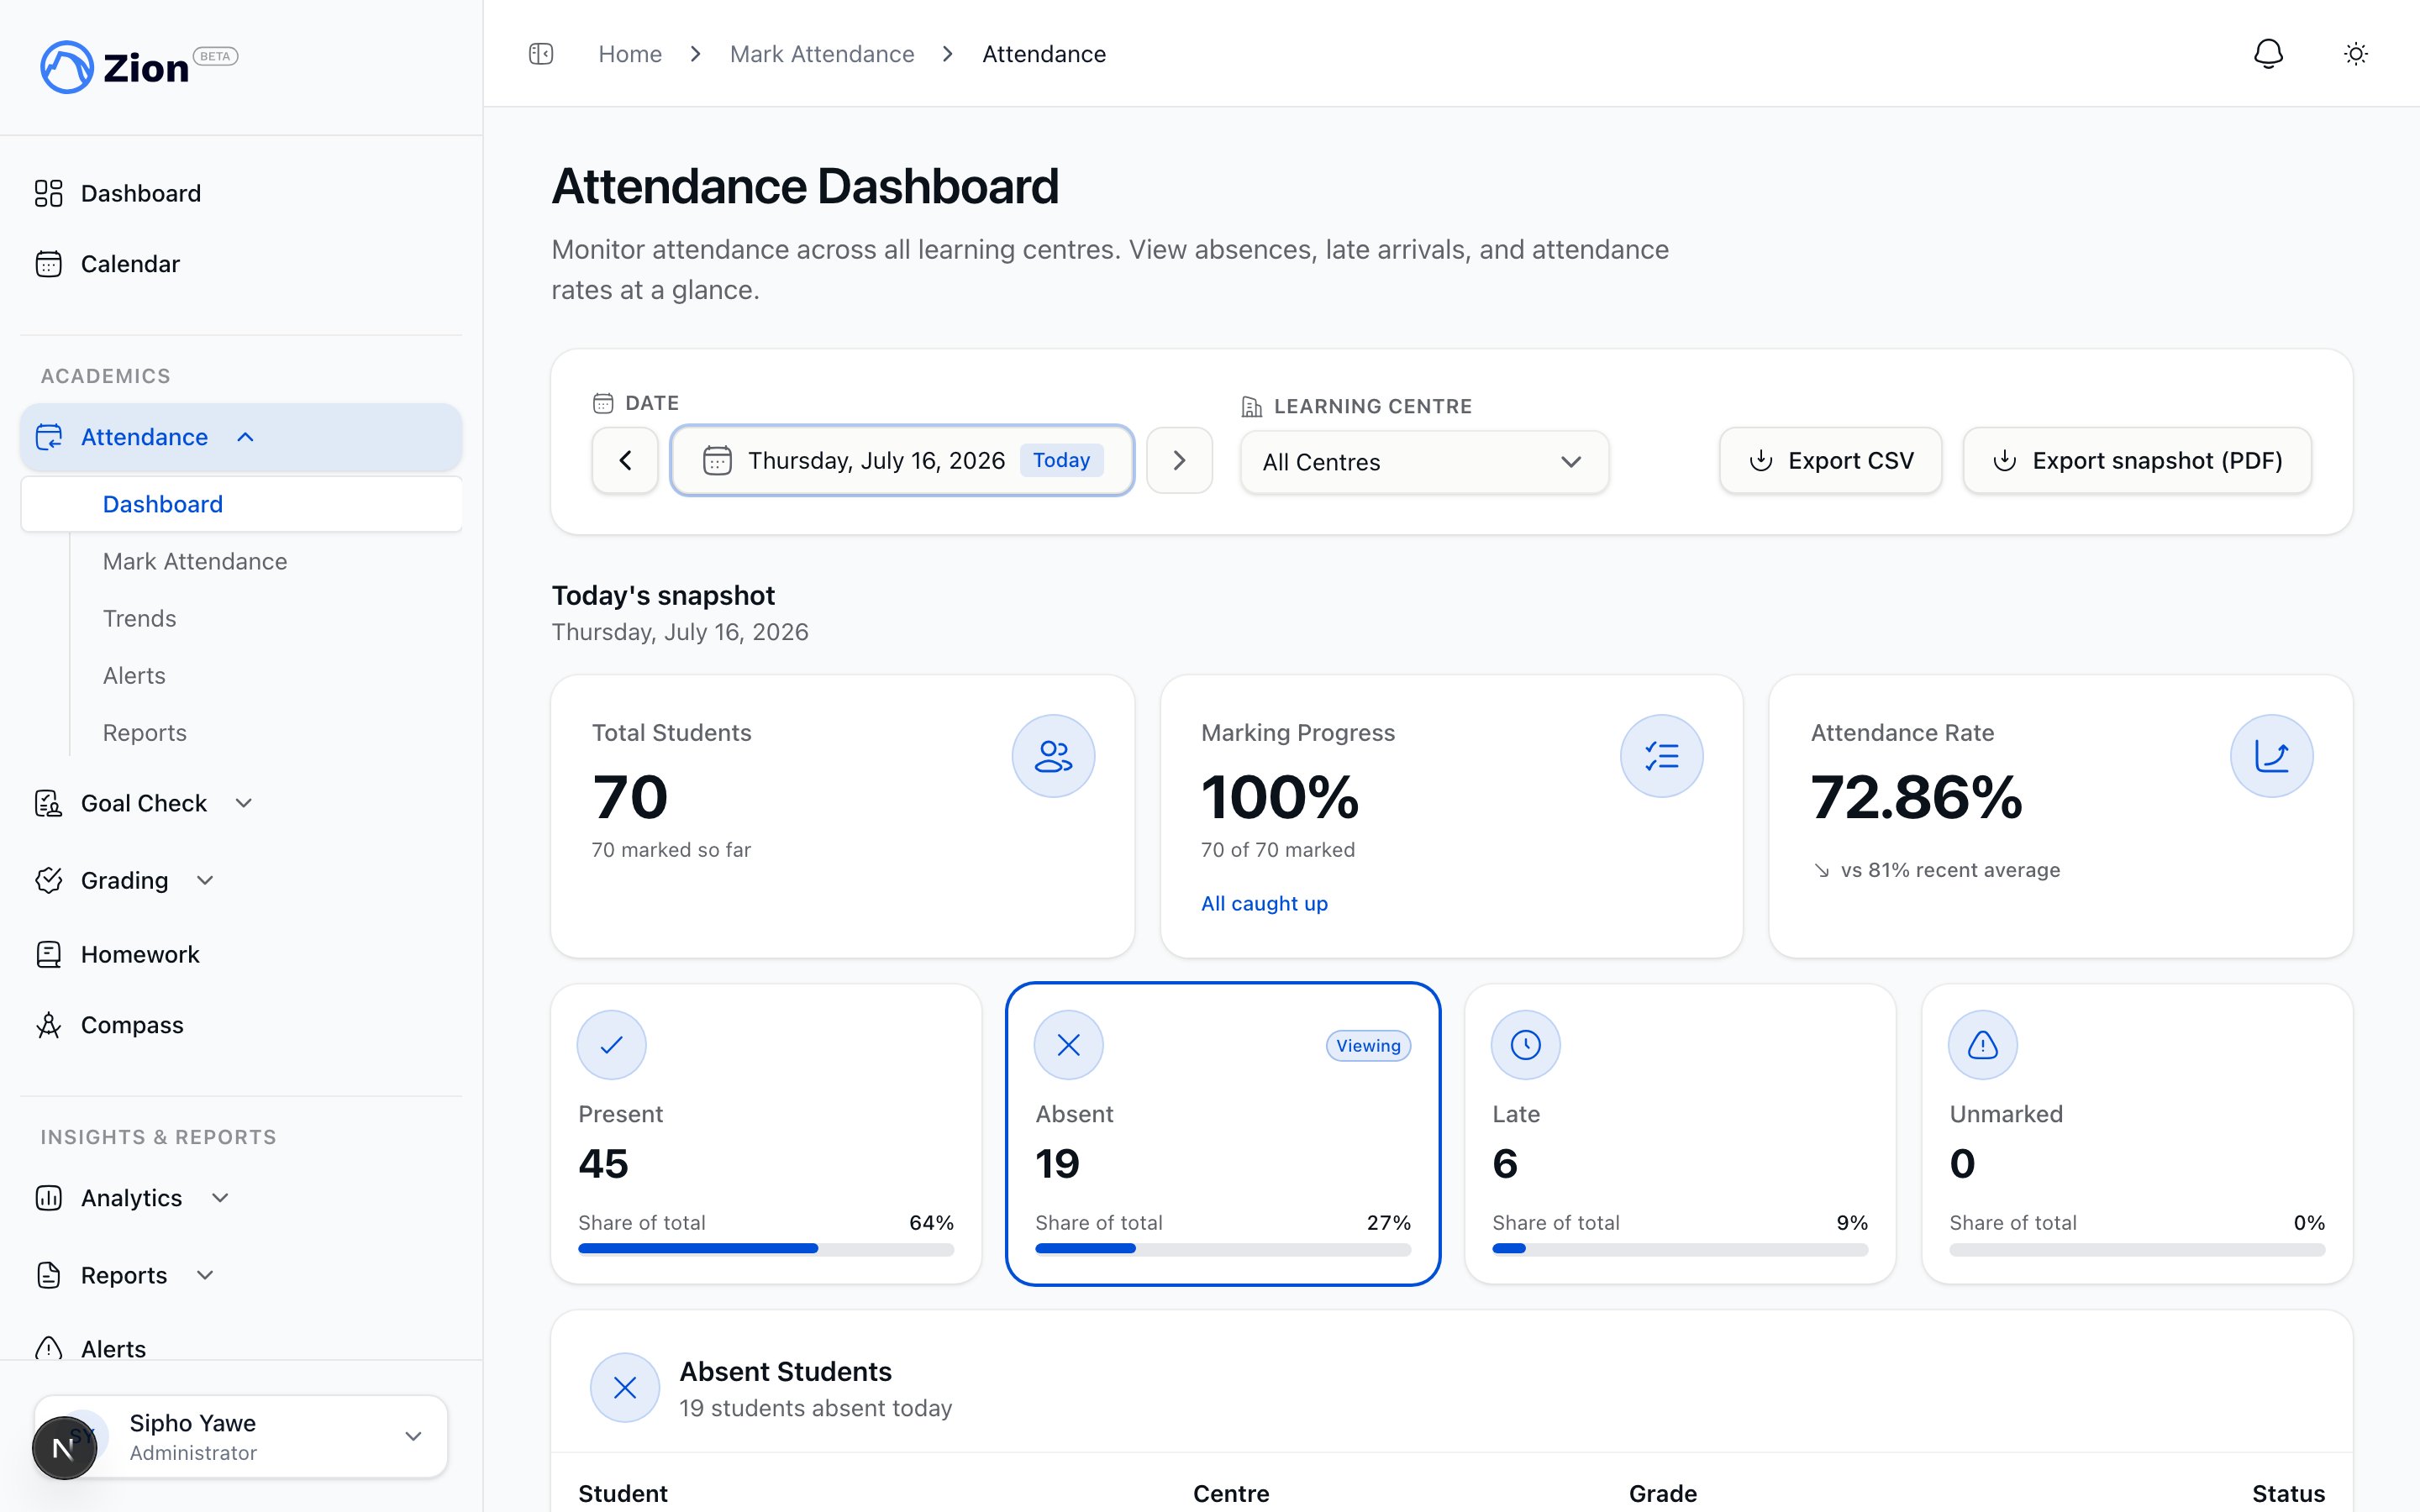
The school-wide attendance dashboard with today's stats and centre breakdown
- Navigate to Attendance > Dashboard.
- Review school-wide attendance metrics for the selected day.
Today’s snapshot
Absent students and late arrivals
The dashboard lists absent students (name, grade, learning centre, and how many times they have been absent this week) and late arrivals (name, arrival time, and any notes entered when they were marked late).Centre breakdown
A chart compares attendance rate and student count across every learning centre. Click a centre to drill into its own dashboard view.Attendance alerts
Zion checks every student’s attendance pattern automatically, every day, and raises new alerts on its own. As an administrator, you can also trigger a check yourself at any time.- Navigate to Attendance > Alerts.
- Review the open queue, filterable by centre and alert type.
Alert thresholds
Consecutive-absence counting walks backward through school days, skipping weekends and holidays, and stops at the first present, late, or unrecorded day. A student’s alert escalates from warning to critical in place if the pattern worsens, and resolves automatically once the student no longer meets either threshold on a later run.
Each alert shows the student’s name and centre, alert type, consecutive absence count, 30-day absence rate, and the list of absence dates.
Acknowledging and dismissing alerts
1
Review the alert
Check the consecutive absence count, the 30-day rate, and the absence dates. Look for a pattern, such as the same day of the week or the same centre.
2
Take action
Contact the parent or guardian, schedule a meeting, or make a referral as needed.
3
Acknowledge or dismiss
Click Acknowledge and enter intervention notes describing what you did. Notes are required. If the alert is a false alarm, click Dismiss instead and enter a reason.
Once you acknowledge or dismiss an alert, Zion will not raise that same alert again for about a week, even if the student’s pattern continues. This keeps a case you are already handling from cluttering the queue again right away.
Alert thresholds and settings
Administrators can adjust the warning threshold, critical threshold, and 30-day critical rate for the organization from the school settings alerts page. See Alerts and reports settings for how to change these values and how email notifications for new alerts are configured.Attendance reports
Report generation is administrator-only.- Navigate to Attendance > Reports.
- Choose a report type: daily, weekly, monthly, term, or custom range.
- Select the date range and the centres to include (all or specific).
- Optionally include Goal Check correlation data.
- Click Generate.
What a report contains
- Overview: date range, centres included, total students, overall attendance rate
- Present, absent, and late counts, with a day-of-week breakdown
- Centre comparison
- Chronic absence list and late arrival patterns
- Optional Goal Check correlation, showing students with both attendance and goal completion issues
Attendance trends
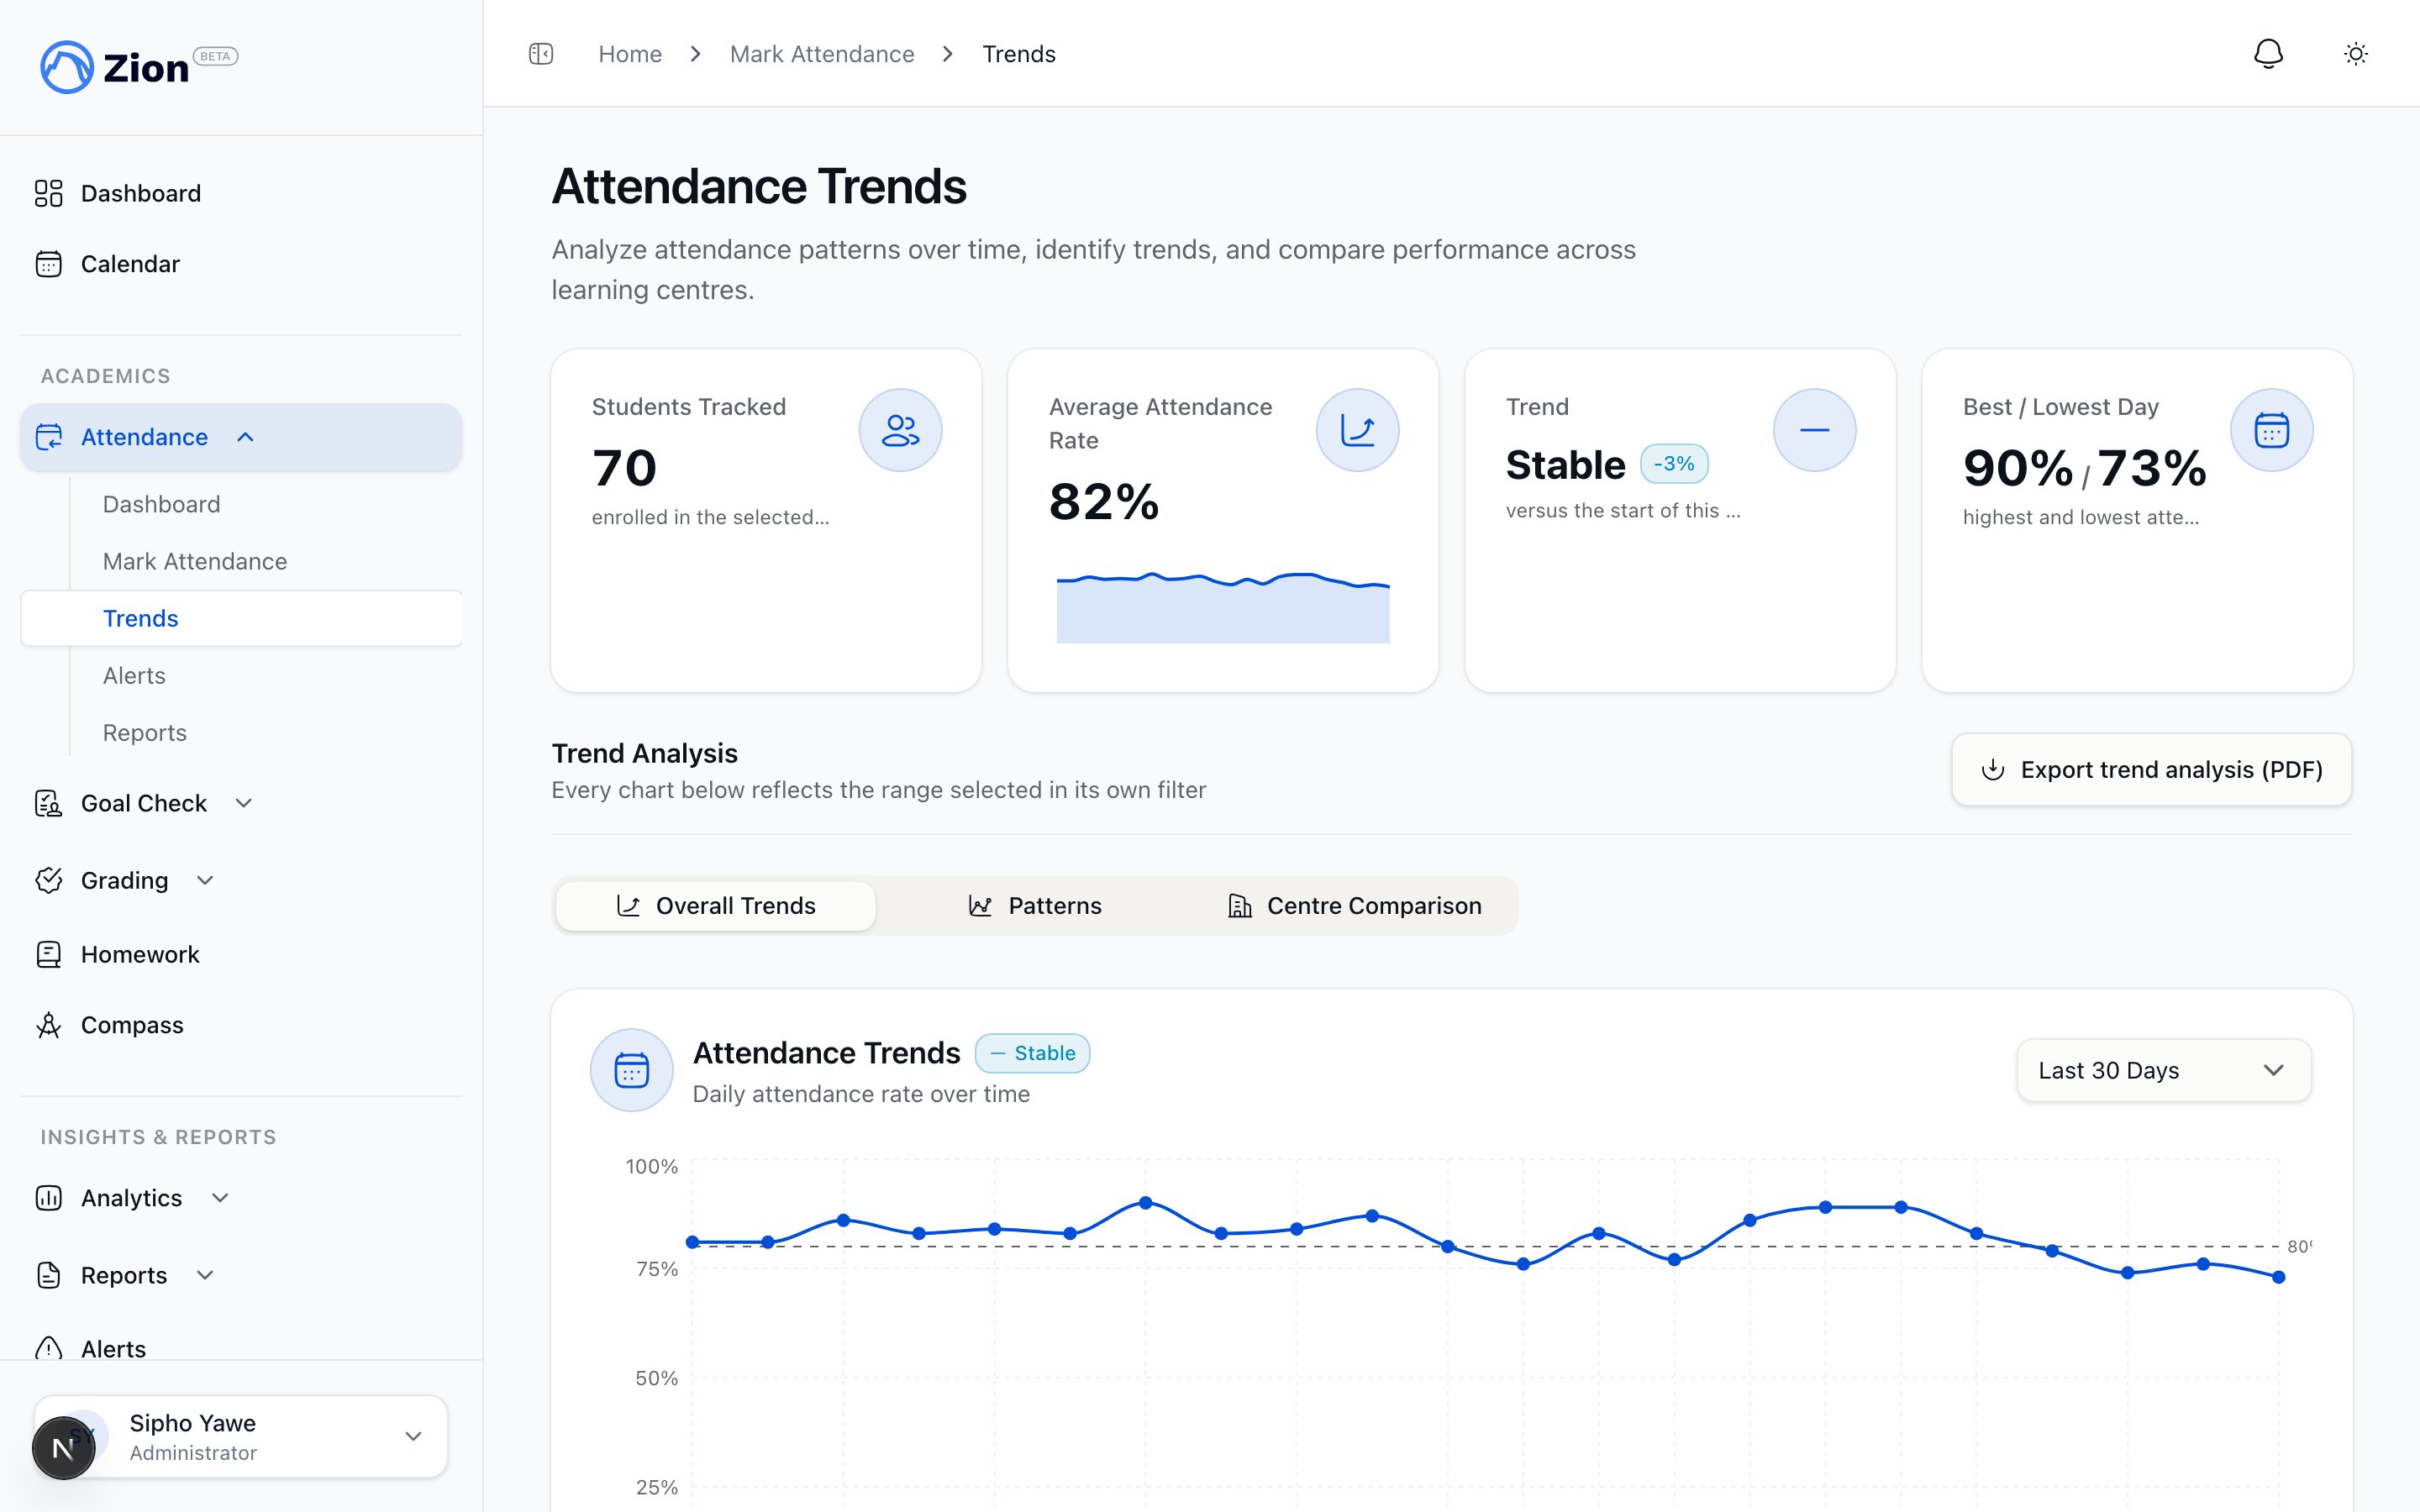
Attendance trends over a selected date range with a centre comparison view
- Navigate to Attendance > Trends.
- Pick a range: 7 days, 30 days, current term, or a custom range. Optionally filter by centre or grade level.
Marking attendance and correcting past records
As administrator you can mark attendance directly for any learning centre, for the current school day, the same way a supervisor or monitor would: select a date and centre, then mark each student present, absent, or late, or use bulk actions. Attendance for any day other than today is locked to normal marking. If you need to change a past record, administrators can turn on correction mode from the banner shown on a locked date and edit individual student statuses. Corrections are written to the audit trail with a before and after value, separate from the normal daily mark. Use direct marking to cover for an absent supervisor or in an emergency. Use correction mode to fix a data entry error after the fact.Escalation for chronic absence
1
Contact the parent or guardian
For a critical alert, contact them the same day.
2
Document the contact
Record what was discussed in the alert’s intervention notes.
3
Schedule a follow-up
Set a meeting if the pattern continues.
4
Involve the centre supervisor
Make sure the supervisor is aware and watching the student’s attendance.
5
Escalate if needed
Move to a formal parent meeting, an attendance improvement plan, or an external referral if interventions do not change the pattern.
Troubleshooting
A centre is not marking attendance
Check whether the supervisor or monitor is logged in and has access to that centre. Mark the day yourself if it is urgent, then follow up with the centre staff.Absence rate jumps suddenly
Check for a school event, weather, or transport disruption before assuming a data entry error. Confirm the numbers with the centre before communicating them further.An alert did not generate for a student who should qualify
Confirm the student is active (not deactivated) and that today’s alert check has already run. You can trigger it yourself as an administrator.Related pages
Attendance overview
Full attendance feature reference
Chronic absence alerts
Alert thresholds and lifecycle in detail
Attendance reports
Report types, exports, and sharing
Supervisor attendance guide
What supervisors see and do for their centres