

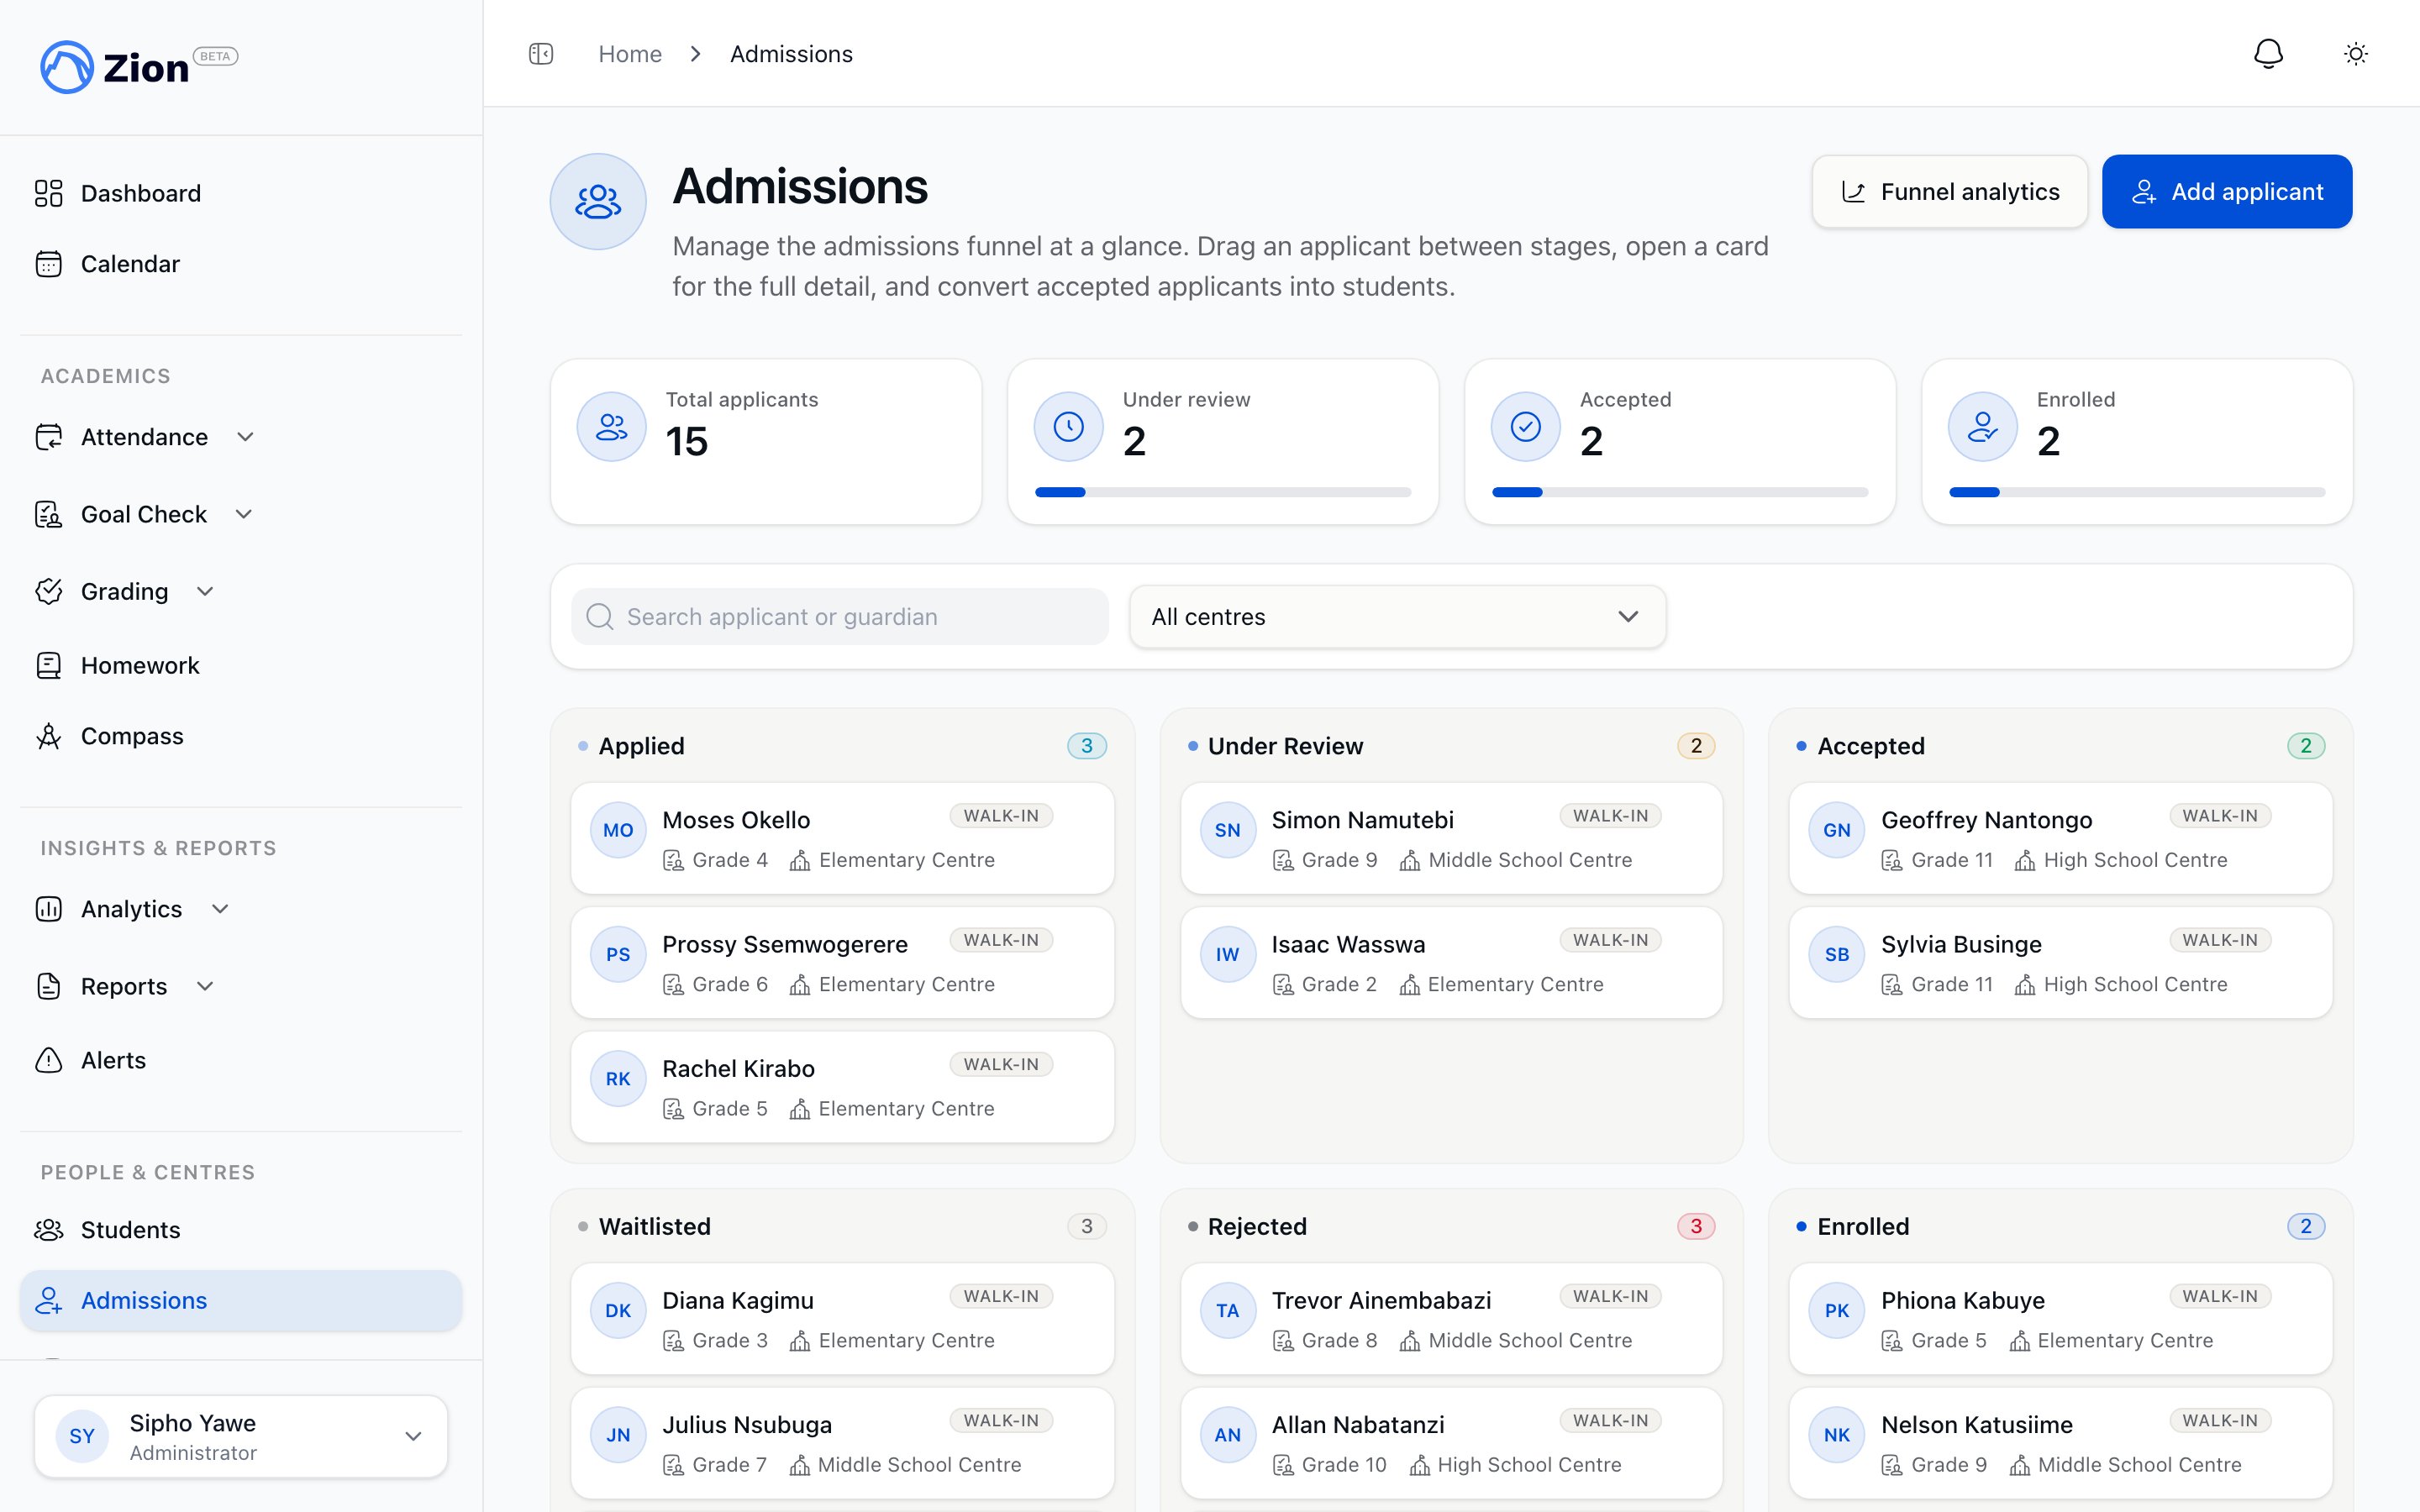
Working an applicant card on the admissions board
Admissions is only visible to the administrator role, and write actions (moving a card, adding an applicant, converting to student) require an active subscription.
The board
Find the board under People & Centres, then Admissions, in the sidebar. It has six fixed columns, in pipeline order:
Cards can be dragged between Applied, Under Review, Accepted, Waitlisted, and Rejected. You cannot drag a card into Enrolled. The board blocks that move with an on-screen message, and it is blocked no matter how you try to do it. Enrolled is only reachable through the convert action described below.
Use the search box to find an applicant by their name or their guardian’s name, and use the centre filter to narrow the board to one learning centre.
Adding an applicant manually
Not every applicant comes from the public form. Use Add applicant to record a walk-in visit or a phone enquiry directly.1
Click Add applicant
On the admissions board, click the Add applicant control above the board.
2
Fill in the same intake fields
Enter the applicant’s details and the guardian’s details, the same fields a family would fill in on the public form.
3
Submit
The application enters the pipeline at Applied. It is recorded as staff-entered rather than online, and it appears attached to the staff member who created it.
The applicant detail drawer
Click a card to open its drawer. It shows:- Applicant fields: desired grade, desired learning centre, date of birth, and how the application arrived (online or staff-entered)
- Guardian fields: name, email, phone, and any notes
- Uploaded documents, each as a link
- An Edit and a Delete action for the application
- A stage selector for moving the applicant to any column except Enrolled
- A Convert to student action, shown only once the applicant is Accepted and has not already been converted
Editing an application
Click Edit at the top of the drawer to update the applicant and guardian details: name, date of birth, desired grade, desired learning centre, guardian name, guardian email, guardian phone, and notes. Make your changes and save. Editing does not move the application to a different pipeline stage; that is a separate action using the stage selector or the board itself.Deleting an application
Click Delete at the top of the drawer to permanently remove an application. A confirmation dialog appears before anything is removed, and once confirmed, the application and its uploaded documents are gone for good.Documents and temporary links
Document links in the drawer are temporary links that expire automatically. Each link stays valid for five minutes from the moment the drawer loads it, so if a link stops working, reopen the drawer to get a fresh one. Accepted document types are PDF, JPEG, PNG, and WebP, up to 10MB per file, with a maximum of 10 documents per application.Moving an applicant between stages
You can change an applicant’s stage from the board by dragging the card, or from the drawer using the stage selector. Both paths update the same record, so use whichever is more convenient while you are already reviewing a file.Converting an accepted applicant to a student
Once an applicant reaches Accepted, the drawer shows a Convert to student action. This is the only way an application becomes an enrolled student.1
Open the Accepted applicant's drawer
Confirm the applicant record has a name, date of birth, desired grade, and desired learning centre filled in. All four are required before conversion is allowed, and the destination learning centre must still exist.
2
Click Convert to student
A confirmation dialog appears before anything is written.
3
Confirm
A new student record is created, and the application is marked Enrolled. The applicant can only go through this once; the drawer will not offer Convert to student a second time for the same application.
4
Parent invite fires automatically
If the application has a guardian email on file, a parent invite is sent as part of the same action. No separate step is needed.
Related pages
Admissions overview
The full pipeline, both intake paths, and where admissions fits in the app.
Funnel analytics
Per-stage counts and conversion rates for the pipeline.
Students overview
What a converted applicant looks like once they are a student record.
Roles and permissions
Who can reach admissions and what each role can do.