

Who can do what
Any other role, or a signed-in user without one of these three roles, is redirected away from the centres pages.
The centres directory
Go to People & Centres > Learning Centres in the sidebar to see the directory.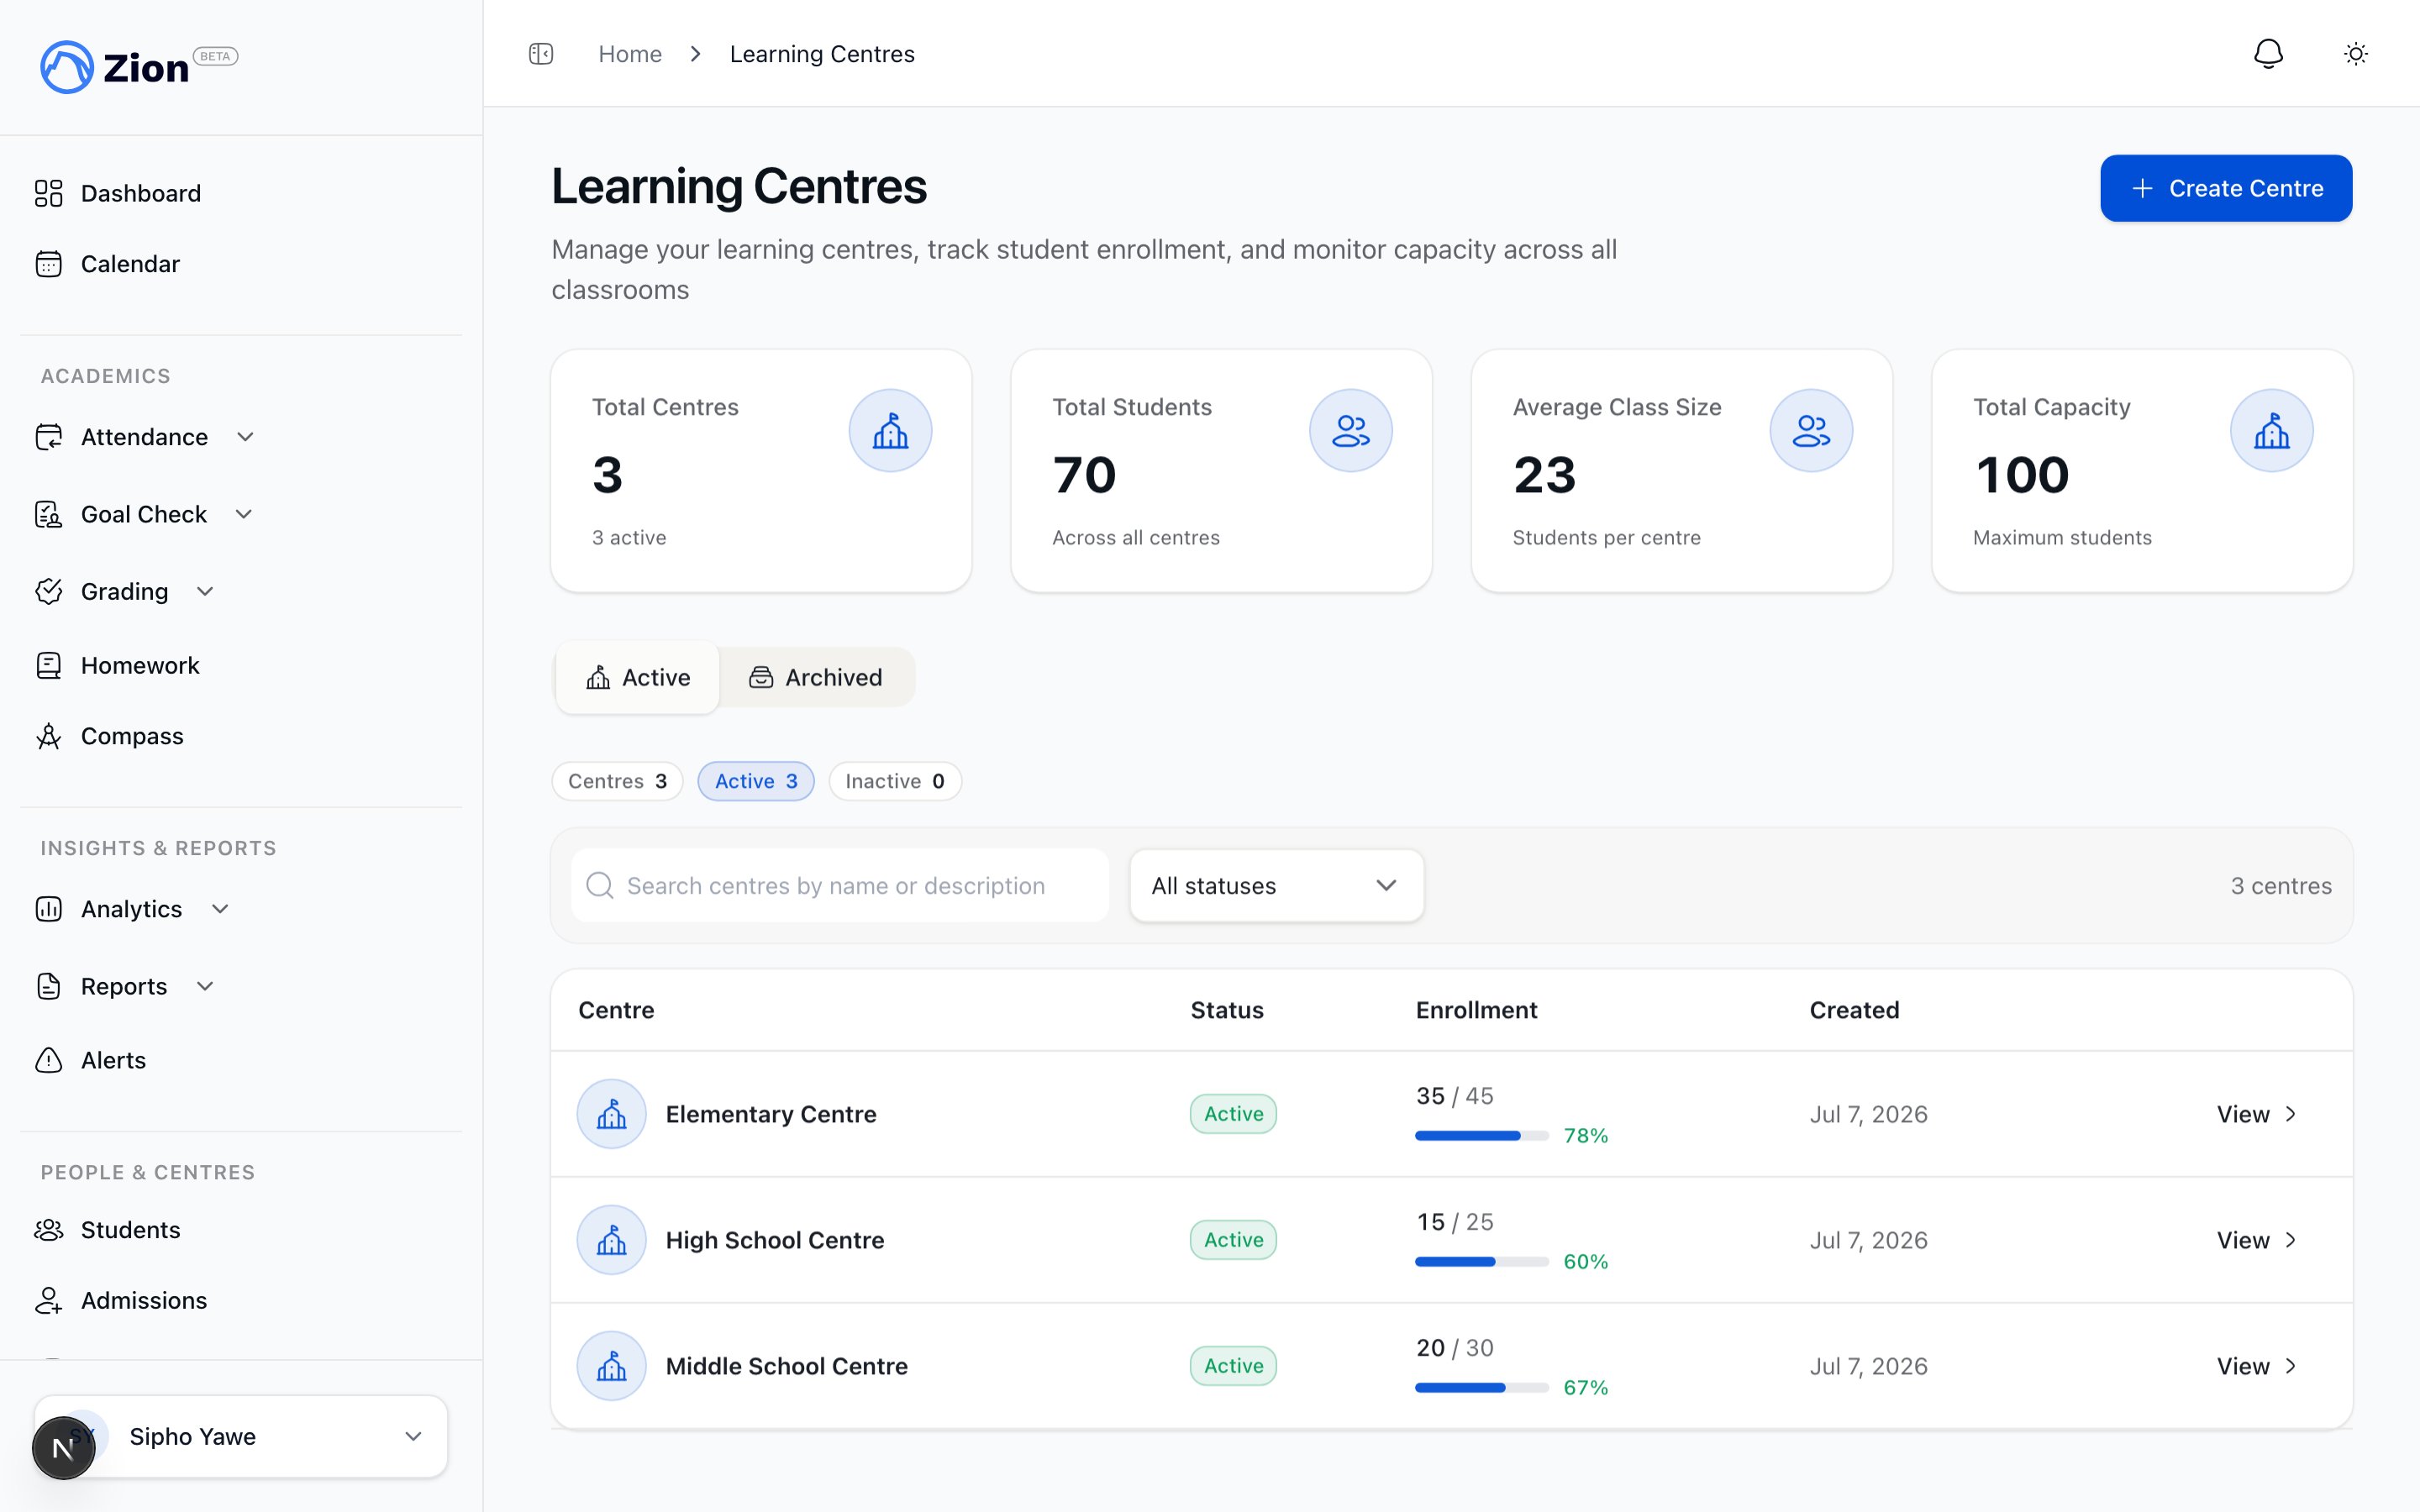
The learning centres directory with stat tiles and centre cards showing student count against capacity.
- Total Centres, with the active count
- Total Students
- Average Class Size
- Total Capacity
The capacity indicator
If a centre has no capacity set, no indicator is shown. Otherwise the indicator on the card and on the centre detail page follows these bands:Capacity is a soft guardrail. Reaching or passing 100% does not block new students from being enrolled in the centre, it only flags the card and detail page for attention.
Creating and editing a centre
1
Open Learning Centres
Go to Learning Centres and click Create Centre. Administrators can also open an existing centre’s detail page and choose to edit it.
2
Fill in the centre form
Enter a name (required) and an optional description. Capacity is optional too. Leave it empty if you don’t need capacity tracking for that centre.
3
Set a timezone (optional)
Leave the timezone blank to have the centre follow your school’s timezone, set under School Settings. Set a timezone on the centre itself if that particular classroom runs on a different clock, for example a satellite site in another region.
4
Save
The centre is created or updated and appears in the active grid.
Adding centres from a spreadsheet
If you are setting up several centres at once, bulk import is faster than the form above.1
Open Bulk Import
On the Learning Centres directory, click Bulk Import.
2
Download the template
Use the template button to get a spreadsheet with a column for Name, Description, Capacity, and Timezone.
3
Fill it in and upload
Name is the only required column. Fill in a Timezone only for a centre that should not follow the school’s default.
4
Review and confirm
Zion shows you how many centres will be created before anything is saved. A row whose name already matches an existing centre is skipped rather than creating a duplicate, and so is a repeated name within the same file.
Archiving and restoring a centre
Administrators can archive a centre they no longer need active. Archived centres move out of the active grid into the Archived tab.1
Switch to the Archived tab
On the Learning Centres directory, use the Active/Archived tab switcher.
2
Find the centre
The archived list shows each centre’s archived date and capacity.
3
Restore
Click Restore and confirm in the dialog. The centre returns to the Active tab.
The centre detail page
Opening a centre from the directory shows:- The centre header with its name, description, and capacity indicator
- A Teaching Staff panel, split into Supervisors and Monitors sub-lists, with an Assign action
- A student roster for that centre
Assigning supervisors and monitors
Assignment is what actually grants a supervisor or monitor access to a centre. A staff member can be assigned to more than one centre.1
Open the centre detail page
Go to the centre you want to staff, from Learning Centres.
2
Click Assign in the Teaching Staff panel
This opens a dialog listing the organization’s members.
3
Select one or more members
Multi-select the supervisors or monitors who should have access to this centre.
4
Submit
The assignment is saved and the member’s roster access updates to include this centre.
Teaching staff and users
Invite staff, assign roles and centres, and manage accounts.
Roles and permissions
Layer custom permissions on top of the built-in roles.
Students overview
See how students are enrolled into a centre’s roster.
Administrator: learning centres
A walkthrough of centre setup from the administrator’s perspective.